The basics of multiple lights for portraits
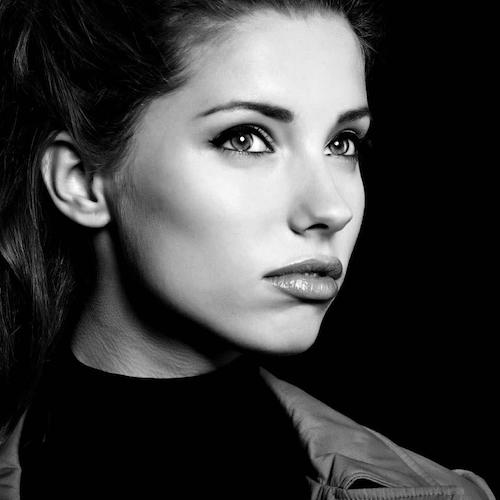
The art of portraiture is about learning how to use lights to create highlights and shadows that sculpt the subject’s facial features and body contours to create form, and the illusion of depth and dimensionality. Light is the tool by which photographers do this.
Whether using natural light, or photographic light in a one-light setup, or multiple lights, it is important to learn how to use a broad range of lighting techniques in order to evolve our own lighting and photographic style.
Key light
The key light—also known as the main light—is the primary light source for shaping the subject’s facial features and will create the overriding pattern of highlight and shadow on the face. The way this light is used, and the modi er employed, will dictate the style of the entire portrait. As the main light source, it will need to be powerful enough to maintain exposure when fitted with some form of modifier, or if used outdoors to be able to compete with daylight.
A common position for the key light is at a 45-degree angle to the side of the camera and about 30 degrees above the subject. However, moving the key light closer to the axis of the camera will—presuming it is diffused or softened in some way—create a sense of roundness, while moving it further than 45 degrees away from the subject- camera axis will create harder shadows and lighting, with a strong contrast between light and dark.
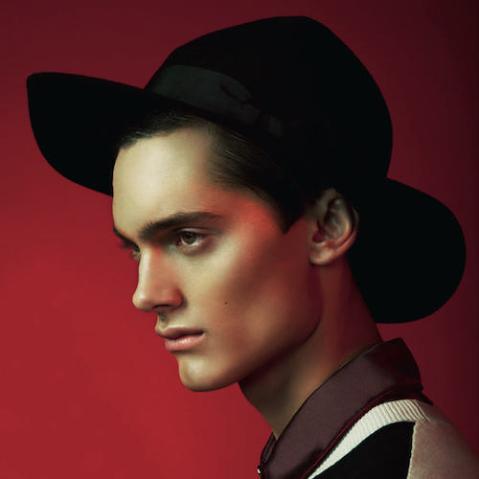
On a general level, there are two main types of lighting in portraiture, namely broad and short lighting, which relate to the side of the face illuminated by the key light. Consider a portrait subject lit by a key light placed at 45 degrees to the camera. Broad lighting requires angling the subject’s face so that the key light illuminates the side of the face most turned toward the camera—that is, it lights the broadest part of the face, relative to the camera. Short lighting, meanwhile, refers to a key light that illuminates the side of the face that is turned away from camera—the shortest or thinnest side of the face.
Broad lighting is not as popular as short lighting as it tends to be flatter with less modelling and shaping. It can, however, be used to widen a thin or long face. Short lighting creates strong contouring of facial features, with deeper shadows, and can be used to thin out a wide face.
Fill light
Like a reflector in an outdoor shot, a fill light is used to complement the key light, controlling the lightness or depth of the shadows the key creates. A fill light is used to retain shadow detail to a greater or lesser degree. A fill light is usually diffused by some form of modifier and should not create its own shadow pattern. To that end, fill lights are often placed close to the camera axis in order to minimise their shadow profile on both the subject and the background. Naturally, our brains are hardwired to expect light from a single source (the sun) so a fill light adding its own shadow profile will look unnatural.
Because fill lights are usually diffused, care has to be taken that its light does not spill over into unwanted areas. Also avoid introducing a second catchlight to the eyes of the subject, as this will give the them a vacant or bored look— although it can be quickly removed in post-production.
The difference in output between the key and fill lights is known as the lighting ratio and is very important in setting the mood of the portrait— evenly lit or deep contrast between light and shadow, or somewhere in between? As a general rule, the fill light will be set at one to two ƒ-stops below the key light to give directional light with details in the shadows.
Hair light
A hair light is often a small light source, or one that has been modified to create a narrow beam of light. It is usually placed above and, sometimes, slightly behind the subject to create a lit edge, or rim of highlights, around the back of the head, neck, and hair. The main purpose of the hair light is to create separation between the subject’s hair and the background, as well as preventing the hair merging into the background; this separation adds a further layer of depth.
 Hair lights are often, but not always, placed above and slightly behind the subject to create separation between the back of the subject’s head and the background, and therefore add another layer of depth and dimensionality.
The hair light is often used opposite the key light. Traditionally, a hair light would only illuminate the hair, but contemporary styles increasingly allow it to spill over onto the cheek, neck, and shoulders, effectively doubling as a kicker. Generally, hair lights should be set at the same exposure as the main light but altered according to hair colour—loosely, blond hair should be one to two ƒ-stops below the key light exposure, while dark hair should be around one to two ƒ-stops over.
From posing and framing, to advanced lighting setups, and reliable post-production and finishing techniques,Photo School: Portrait, by Michael Freeman and Gary Eastwood covers all the essential aspects of quality portraiture. Get motivated by numerous and specific shooting challenges, and be inspired by sample work from fellow photography students, with critical evaluations of the results to improve your understanding of the core concepts.
 Photo School: Portrait
Michael Freeman and Gary Eastwood
Buy it now!
RRP for print edition: £17.99
